

Rough-In and Below-Ground Drainage
By Thomas Masters · 7 min read
Plumbing Rough-In and Below-Ground Drainage: What Goes Under Your Slab and Why Proof Matters
When you are building a new home or adding an extension, what happens before the concrete truck rolls in is a critical phase of the plumbing installation. This guide covers set-out, drainage falls, checks before cover and the records that help keep a build on track.
For builders, assessing how a plumbing contractor handles this phase helps you understand their approach to a construction site. Drainage falls, pipe positions and structural protection all need attention before the work is covered.
Agree on the set-out, testing, inspections and records before the concrete pour. That gives the next trades a clear starting point and reduces the risk of costly changes later.
The build programme
What rough-in means and where it sits in the build programme
Below-ground drainage and above-ground rough-in are separate stages. Each needs to fit the builder's programme, with the relevant checks completed before cover.
Below-ground drainage, also called first internal drainage, happens early in the build. The drainage is set out and installed after excavation and preparation for the slab, before framing and finishes go up.
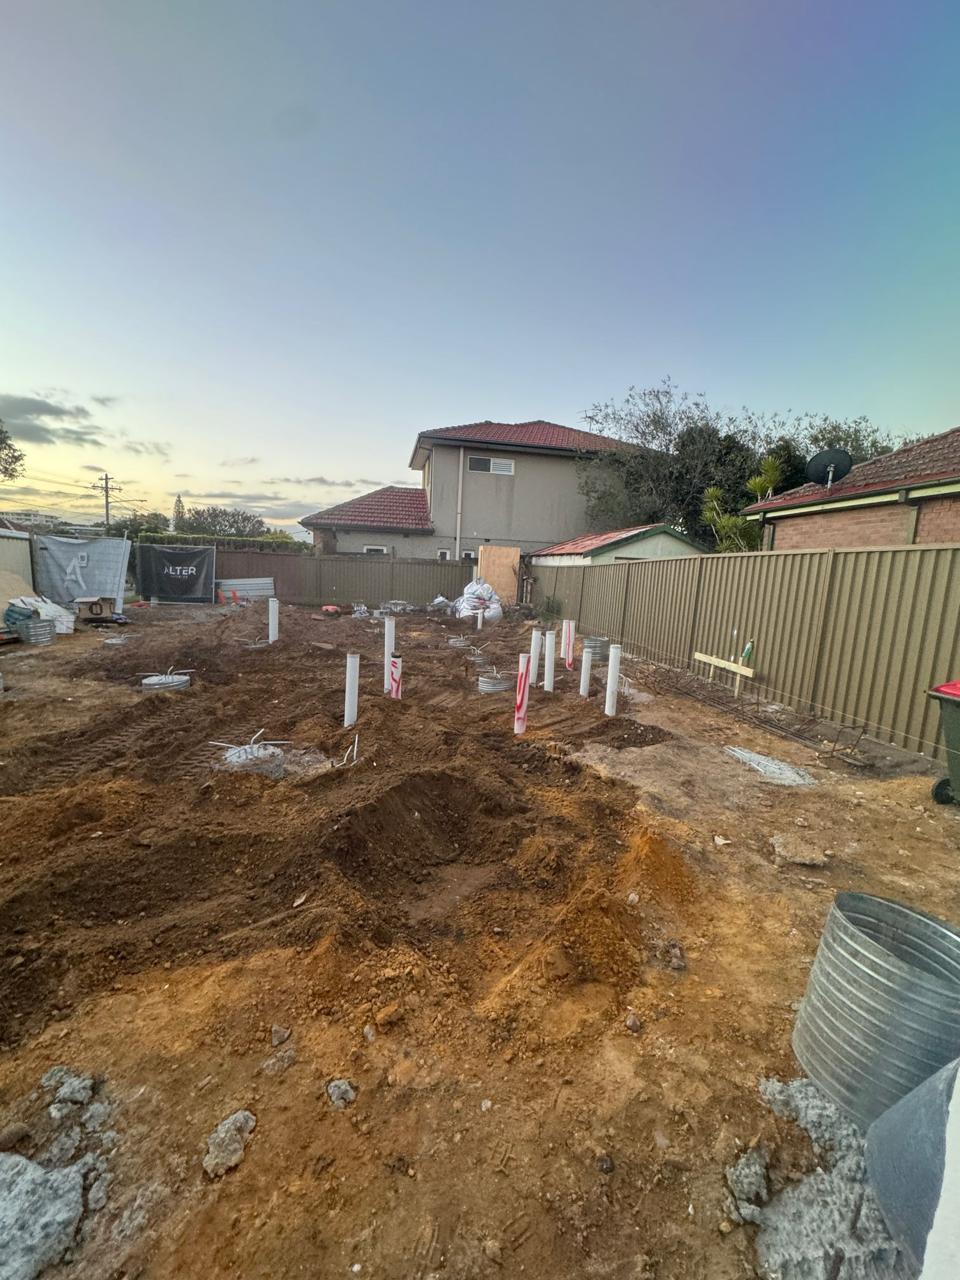
Above-ground rough-in comes later. This is when water supply, drainage and vent pipes are installed within the framework before sinks, toilets and tapware are fitted.
Getting the early stage right requires coordination with the builder's schedule. Allow for the relevant testing, inspections and documentation before concrete is poured. These checks should be part of the programme, rather than an extra task squeezed in at the end.
Before the slab
What gets set out: drainage falls, pipe positions and riser heights
The initial layout needs precise measurements and an understanding of how gravity affects the drainage system.
Sewer connection and levels
First, confirm the main sewer connection point and its depth. The system must fall towards that outlet so wastewater can flow away. The connection level affects the layout upstream, so it needs to be known before the main drain and branches are installed.
Set-out measurements
Establish fixed reference points so every pipe lines up with the internal walls once the framing goes up. Plan where vertical pipes, known as stacks, for a second storey will run. This helps keep them within the intended wall spaces rather than requiring an unexpected boxed-out section in a finished room.
Main drain, branches and risers
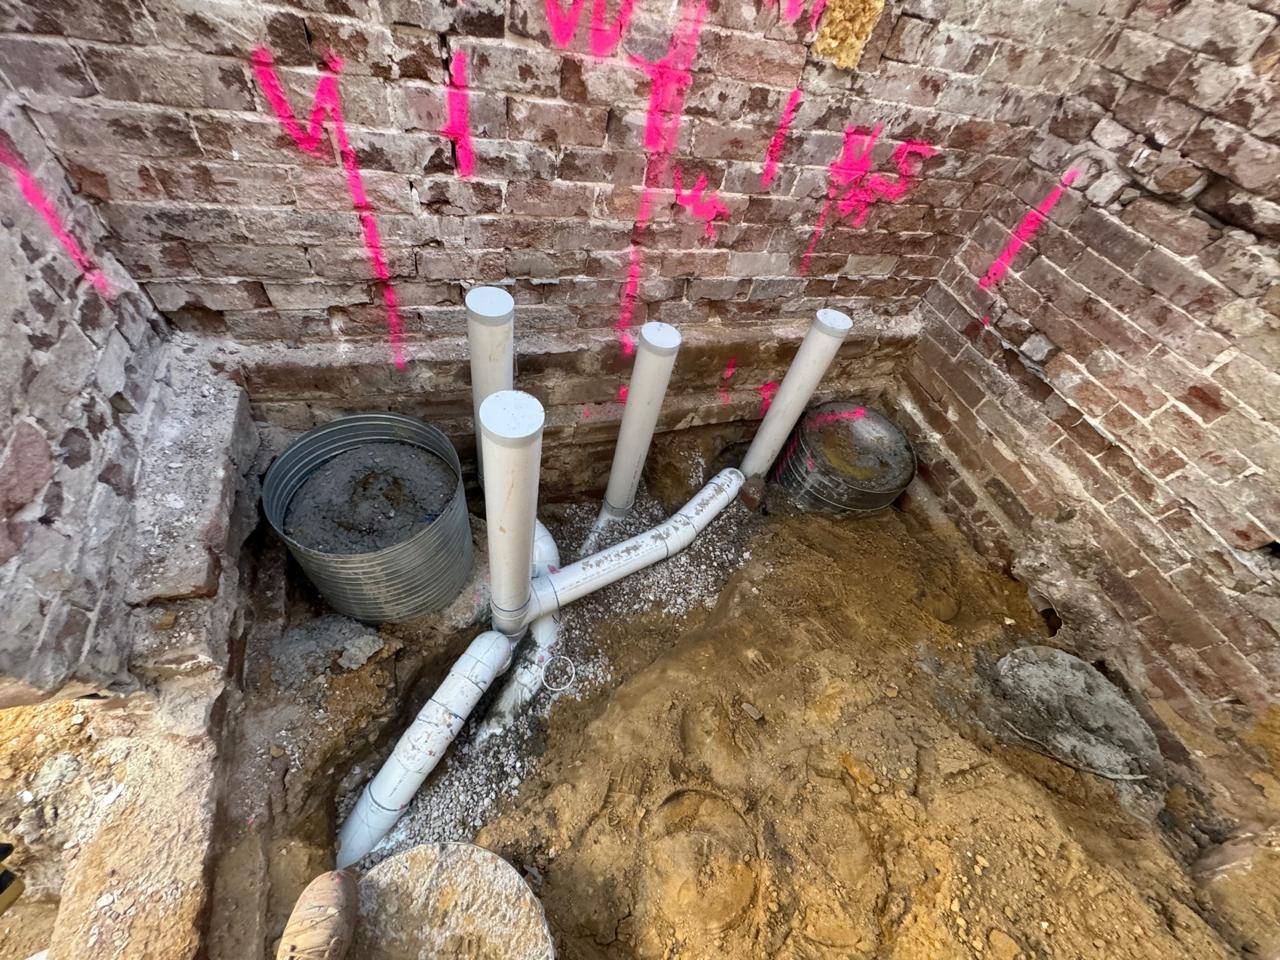
The main drain is laid at the required grade, followed by branch lines to each toilet, shower, floor waste, basin, kitchen sink and laundry. Each riser needs the correct position and height, with open pipe ends securely capped.
Decisions before cover
What becomes difficult to change once concrete goes down
Under-slab pipework is no longer readily accessible once the slab is poured. Small set-out errors can become much bigger jobs to correct.
This includes the positions of toilets, shower wastes and floor wastes, along with pipe sizes, junctions and drainage falls. Floor wastes and shower drains need particular care because their traps sit beneath the floor, limiting the options for later adjustment.
If a fixture position is wrong, rectification may mean cutting or jackhammering concrete to reach the pipework. That can affect the next trades and may require further work to the slab or finished floor. Checking the set-out while everything is visible is far simpler.
Above the ground floor
Planning pipe runs to protect ceiling heights
Upstairs bathrooms drain through the floor or ceiling space below. Long runs and structural beams can affect the room underneath.
Every drainage pipe requires a consistent fall, which adds up over longer distances. A large pipe passing beneath a structural beam can consume valuable vertical space. Without early planning, the result may be a dropped ceiling or an unexpected bulkhead in a living area.
Coordinate the drainage layout with the structure and architectural plans. With timber floors, suitable routes between joists may be available. Any required ceiling drop should be discussed early so it can be incorporated into the design, rather than discovered after framing.
Keeping the programme on track
What goes wrong when the stage is rushed
Rushing drainage set-out can create problems that affect more than the plumbing trade.
- Fixtures ending up in incorrect positions.
- Inadequate drainage falls contributing to recurring blockages.
- Missed junctions and clashes with structural footings or beams.
- Unplanned bulkheads and dropped ceilings in living areas.
Fixing errors after the pour can involve opening the slab, re-laying pipework and patching concrete. If finishes are already installed, waterproofing and other work may also need attention. This can push back subsequent trades and disrupt the build schedule.
Records before cover
Photo documentation: what gets recorded and what the builder receives
A clear record helps the builder and later trades understand what will be hidden beneath the slab and inside the walls.
Useful records show the pipe runs, junctions and riser positions while they are still visible. Measurements from fixed reference points help explain their location. Keep the relevant test results and inspection records with the plans so the project has an accessible reference after cover.
These records can help later trades plan penetrations and give the owner useful information for future renovations. They do not replace checking before drilling or cutting, but they reduce guesswork about the concealed layout.
The next stages
What happens next: above-ground rough-in and fit-off
Once the slab is ready and the framing goes up, the project moves into the next plumbing stages.
Above-ground rough-in
Water supply lines, drainage and vent pipes are run through the timber or steel frame before wall linings are installed. Coordinate this work with other services so clashes can be addressed while the frame is open.
Fit-off
Tapware, toilets, basins, showerheads and vanity connections are installed once the relevant painting and tiling are complete. The earlier set-out decisions now need to line up with the finished surfaces and selected fixtures.
Not sure which approach suits your project?
Getting the foundational plumbing right starts with clear plans, coordinated stages and checks before cover. Discuss your programme and scope with TM Pro Plumbing, with up-front pricing and no hidden extras.
Explore our New Build Homes work on the Builders page, or read our bathroom renovation timing guide to see how the trade stages fit together.
Planning a construction plumbing project?
Talk to our construction plumbing team about your programme, scope and site requirements.